How to Generate Your First AI Short Video in 10 Minutes: A Practical Guide to Pixelle-Video
Learn how to automate the entire short video pipeline—from scriptwriting and AI visuals to voiceover and BGM—using the open-source Pixelle-Video engine. This step-by-step guide covers environment setup, AI service configuration, and a complete hands-on video generation walkthrough.
If you've ever created content for social media, you know the struggle: writing scripts, hunting for images, recording voiceovers, editing footage, adding BGM... one complete workflow can easily swallow half your day. The real kicker? After all that effort, the engagement metrics might still fall flat.
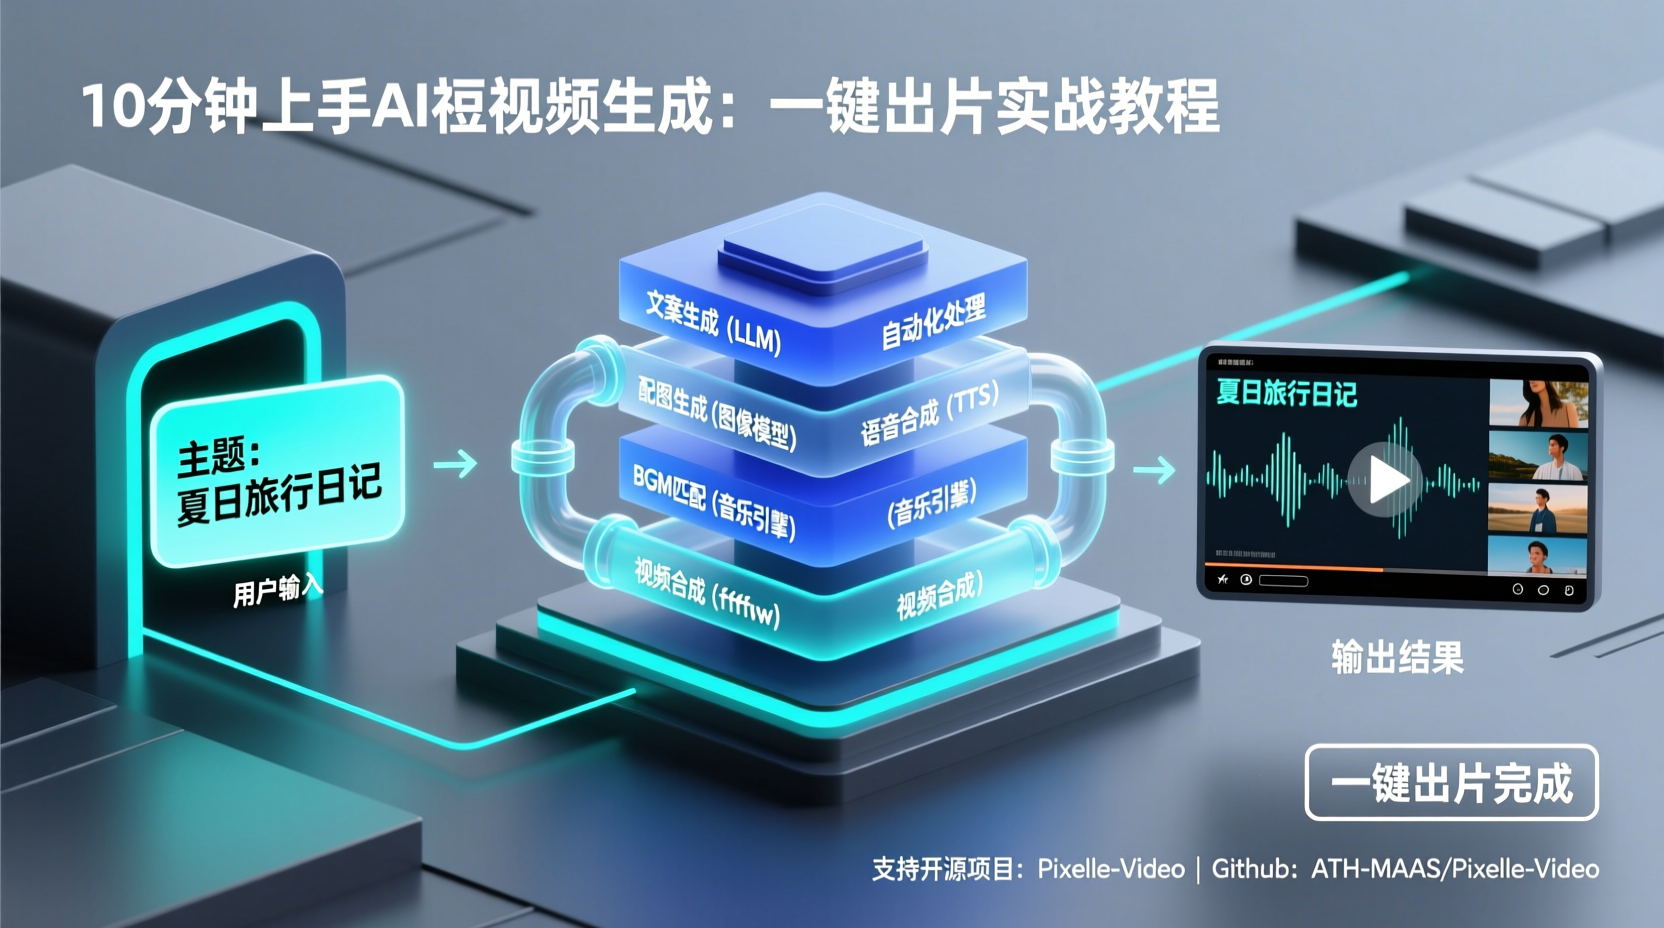
In this tutorial, I'll walk you through automating the entire short video creation pipeline using the open-source project Pixelle-Video. You only need to input a topic, and it will automatically handle script generation, AI image creation, voice synthesis, background music insertion, and final video compilation. Zero editing experience required, and you won't need to write a single line of code.
By the end of this guide, you'll be able to independently set up the run environment, configure AI services, and generate a complete short video in one click. Let's get started.
Prerequisites
Before diving in, make sure you have the following ready:
- Python Environment: Python 3.10+ recommended (the project uses
uvas a package manager, which handles dependencies automatically) - ffmpeg: The core engine for video processing and composition
- An LLM API Key: Qwen, GPT, or DeepSeek work well for script and prompt generation
- Optional Image/Video Generation Services: DashScope, OpenAI, Kling, or a locally deployed ComfyUI instance
Why do you need these? The LLM handles scriptwriting and storyboard planning,
ffmpeghandles the final video composition, and image/video models generate the visual assets. If you want to keep costs at zero, run LLM locally via Ollama and use a local ComfyUI deployment for image generation.
Environment Setup
Step 1: Install uv and ffmpeg
uv is a next-generation Python package manager, significantly faster than pip and venv. Pixelle-Video recommends it for seamless dependency management.
Install uv
Check the official uv documentation for installation instructions matching your OS. Once installed, verify it in your terminal:
bash
uv --version # Verify the version number appearsInstall ffmpeg
This is the underlying engine for video composition. Skipping it will cause direct runtime errors.
For macOS:
bash
brew install ffmpegFor Ubuntu / Debian:
bash
sudo apt update && sudo apt install ffmpegFor Windows: Download from https://ffmpeg.org/download.html, extract it, and add the bin directory to your system's PATH environment variable.
Verify installation:
bash
ffmpeg -version # Version info should print successfullyStep 2: Clone the Repository & Launch
bash
git clone https://github.com/ATH-MaaS/Pixelle-Video.git
cd Pixelle-Video

## Use uv to run the app directly; it automatically installs all dependencies
uv run streamlit run web/app.py
Once running successfully, your browser will automatically open http://localhost:8501. If you see the web interface, your environment is ready.
Why
uv runinstead ofpip installfirst?uv runcreates an isolated temporary environment, installs dependencies, and runs the app without polluting your global Python environment. It's the cleanest approach for quick testing.
Windows Quick Start: If you prefer to skip environment setup entirely, the official repository offers a Windows all-in-one package. Simply download, extract, and double-click
start.bat. All dependencies are pre-bundled.
Core Configuration: Connecting AI Services
When you first open the web interface, expand the 「⚙️ System Config」 panel on the left. This acts as the "brain" of the entire engine.
LLM Configuration (Required)
This is the core for script generation. The dropdown menu comes pre-configured with common models like Qwen, GPT-4o, and DeepSeek. Selecting one will auto-fill the Base URL and Model name; you only need to paste your API Key.
Recommendation: Users in China should prioritize Qwen for its excellent cost-to-quality ratio in script generation. If you prioritize speed, DeepSeek is a strong alternative.
Media Model Configuration (Optional)
If you want to directly call image/video generation APIs (bypassing ComfyUI), configure the corresponding provider's keys here (e.g., DashScope/Qwanxiang, OpenAI, Kling).
Each provider can be toggled independently for local proxy usage. Enable the proxy switch if you're experiencing network instability.
When do you need this? You must configure this if you select image or video workflows starting with
api/.... If you only use locally deployed ComfyUI, you can leave these fields blank.
⚠️ Always click 「Save Config」 after making changes, or they will be lost on page refresh.
Hands-On: Generating a "Travel Scenery" Short Video
With the environment ready and services configured, let's run a real generation pipeline.
Step 1: Input a Topic
In the 「📝 Content Input」 section on the left, select the 「AI Generated Content」 mode and enter your topic:
Travel scenery makes you want to lingerYou can also switch to "Fixed Script" mode and paste your own pre-written text. However, for your first run, stick with AI generation to experience the full automation.
Step 2: Choose BGM
In the same panel, locate the background music option. Beginners can simply select default.mp3 from the 「Built-in Music」 list. To use your own track, drop the MP3 file into the project's root bgm/ folder, and it will be auto-detected.
Step 3: Configure TTS & Visual Style
The middle column handles voice and visual settings:
- TTS Workflow: Defaults to
Edge-TTS, which is free and highly effective. If your TTS workflow supports voice cloning, you can upload a reference audio file. - Image Generation: Defaults to
image_flux.json, which produces high-quality visuals. - Image Resolution: Defaults to 1024x1024. Keep this for vertical short videos.
- Prompt Prefix: This controls the overall artistic style of generated images. For example, entering
Minimalist black-and-white matchstick figure style illustration, clean lineswill yield a minimalist stick-figure aesthetic. Note: This field must be in English.
Step 4: Pick a Template & Generate
Scroll down to 「Video Template」 and choose based on your needs:
static_*.html: Text-only templatesimage_*.html: AI-generated images as backgroundsvideo_*.html: AI-generated videos as backgrounds
After selection, switch to the right panel and click 「🎬 Generate Video」.
You'll see real-time progress logs:
Generating script... ✓
Planning storyboards... ✓
Storyboard 1/5 - Generating visuals... ✓
Storyboard 2/5 - Generating visuals... ✓
...
Synthesizing voiceover... ✓
Composing video... ✓
Generation complete!
Depending on the number of storyboards and network latency, the process usually finishes within a few minutes. Once done, the video will auto-play in the preview window, and the final file will be saved in the output/ directory.
Troubleshooting & Pro Tips
1. Startup Error: ffmpeg Not Found
This is the most common pitfall. Even if ffmpeg -version works in one terminal, the app might still throw an error due to stale environment variables. Windows users must restart their terminal after updating PATH. macOS users can try running brew link ffmpeg.
2. Generation Feels Slow
Bottlenecks usually occur at two stages: LLM script generation or image model inference. If API calls lag, check your network stability. For local ComfyUI, GPU memory is the limiting factor; lowering the image resolution significantly speeds it up.
3. Unsatisfactory Visual Style
Go back to the "Prompt Prefix" and adjust the style description. Alternatively, swap to a different image generation workflow available in the workflows/ directory. Different workflows utilize different underlying models and prompt templates, yielding vastly different outputs.
4. TTS Sounds Too Robotic
Switch to the Index-TTS workflow and upload a clean reference audio clip with minimal background noise. Voice cloning typically produces much more natural speech compared to standard Edge-TTS.
5. Managing Costs
The project fully supports a zero-cost setup: Local Ollama (LLM) + Local ComfyUI (Image Generation) = $0. If your GPU lacks sufficient VRAM, the Qwen API + Local ComfyUI combo is extremely cost-effective.
Summary & Next Steps
Let's recap the workflow we just completed:
- Installed
uvandffmpeg, cloned the repository - Launched the web interface with
uv run streamlit run web/app.py - Configured the LLM API and optional media model keys
- Input a topic, selected BGM, tuned visual styles, and picked a template
- Clicked generate and waited for the final cut
Once familiar with the interface, you can go from setup to final export in under 10 minutes. Under the hood, this is a fully automated pipeline: Script Generation → Storyboard Planning → Frame-by-Step Visual Processing → Video Composition. Every stage supports flexible model or workflow substitution.
Recommended Next Steps:
- Try the "Custom Assets" workflow: upload your own photos and let the AI analyze them to generate a script
- Explore the built-in video templates to find the one that best matches your channel's aesthetic
- If you're comfortable with ComfyUI, write your own workflows, drop them into the
workflows/directory, and build a fully custom generation pipeline
The creator economy is highly competitive. The time you save with automation is the time you reinvest into producing more content. Give it a try, and drop a comment letting me know how your first AI-generated video turned out!