How to Build a Local Voice AI Agent from Scratch: STT, LLM, and TTS Integration
A practical, step-by-step guide to deploying a fully local, open-source voice interaction AI Agent using Hugging Face's `speech-to-speech`. Learn to chain VAD, STT, LLM, and TTS modules into a seamless pipeline without relying on cloud APIs.
How to Build a Local Voice AI Agent from Scratch: A Complete Guide to STT, LLM, and TTS Integration
Opening: Why Do We Need a Local Voice Agent?
Over the years of development, I've constantly pondered one issue: Many voice assistant and smart customer service demos look impressive, but when it comes to self-hosting, you're either scared off by cloud API costs, plagued by high latency, or simply can't get it running.
Especially when a team needs to quickly validate a voice interaction scenario (like real-time meeting translation, a local voice assistant, or even adding conversational capabilities to a robot), constantly calling cloud APIs, managing accounts, and worrying about usage quotas drastically reduces efficiency.
The goal of this article is straightforward: Starting from zero, we will build a complete voice interaction Agent locally. You speak a sentence, it hears you, understands it, and replies with voice. Fully open-source, entirely local, zero cloud APIs required.
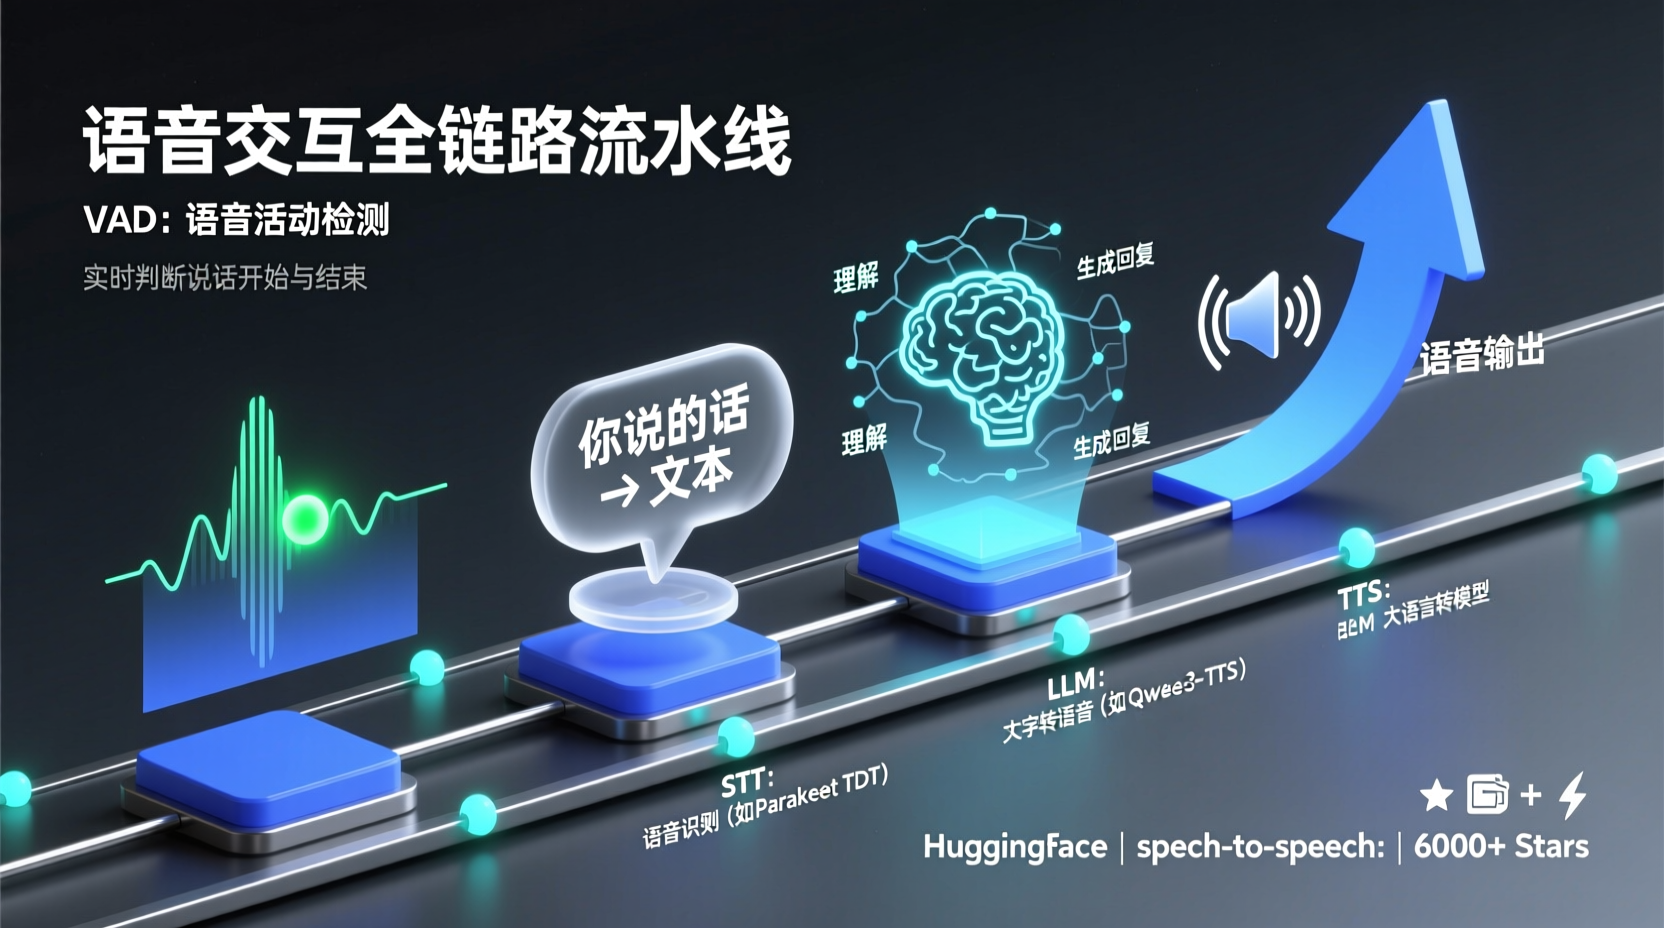
The project is Hugging Face's official speech-to-speech, boasting over 6,000 stars. Its core philosophy breaks voice interaction into four swappable modules that you can assemble like building blocks.
Architecture Overview
The architecture is remarkably intuitive—it's essentially a pipeline:
- VAD (Voice Activity Detection): Detects when you're speaking and when you stop.
- STT (Speech-to-Text): Converts your speech into text.
- LLM (Large Language Model): Understands the text and generates a response.
- TTS (Text-to-Speech): Synthesizes the response into speech and plays it back.
Each module is independently replaceable, meaning you can freely combine the best solutions based on your hardware, language requirements, and latency constraints.
Prerequisites
Before diving in, ensure your environment meets the following:
- Python 3.10 or higher (strict requirement)
- macOS with Apple Silicon offers a smoother experience (optimized for MPS)
- NVIDIA GPUs support more STT/TTS backends
- Basic terminal proficiency
You don't need to understand deep learning fundamentals, but it helps to know how models are "loaded" and "inferred"—this will help you grasp why certain steps might be slower.
Quick Start: Run the Minimal Pipeline in 3 Steps
Step 1: Installation
bash
pip install speech-to-speechThis command installs the core components by default: Speech Recognition (Parakeet TDT), LLM calling (OpenAI-compatible API), and Speech Synthesis (Qwen3-TTS). On Mac, it automatically adapts to the mlx-audio backend; on Linux, it defaults to GGML acceleration.
Step 2: Start the Service
If you have an OpenAI API Key, the simplest way to start is:
bash
export OPENAI_API_KEY="your_key"
speech-to-speech
This launches a local WebSocket service (ws://localhost:8765/v1/realtime) using OpenAI models as the brain by default. However, our goal today is fully local, so we'll skip this mode.
Step 3: Understand Running Modes
The project offers several running modes. Beginners are advised to use local mode, which directly taps into your computer's microphone input and speaker output:
bash
speech-to-speech --mode local --stt parakeet-tdt --tts qwen3 --model_name ggml-org/gemma-4-E4B-it-GGUF --responses_api_base_url http://127.0.0.1:8080/v1 --responses_api_api_key ""This command looks long, so let's break it down:
--stt parakeet-tdt: Uses NVIDIA's Parakeet model for speech recognition (supports 25 European languages).--tts qwen3: Uses Qwen3-TTS for speech synthesis.--model_name&--responses_api_base_url: Specify the locally running LLM service address.--responses_api_api_key "": Empty key, as the local service requires no authentication.
At this point, you'll see the core idea: Tell the system which tool to use for each step and where to call it. It's like assembling Lego via CLI parameters.
Practical Example: Building a Fully Offline Voice Assistant
1. Launch the Local LLM Service
In your first terminal, start a large model service using llama.cpp:
bash
## If you don't have llama.cpp, download a pre-built release first:
## https://github.com/ggerganov/llama.cpp/releases

llama-server -hf ggml-org/gemma-4-E4B-it-GGUF -np 2 -c 65536 -fa on --swa-full
This starts an OpenAI-compatible API service at http://127.0.0.1:8080. The -hf flag automatically downloads the model from Hugging Face; the first run will take a few minutes to download.
2. Launch the Voice Agent & Start Chatting
Open a second terminal:
bash
speech-to-speech \
  --mode local \
  --stt parakeet-tdt \
  --tts qwen3 \
  --model_name "ggml-org/gemma-4-E4B-it-GGUF" \
  --responses_api_base_url "http://127.0.0.1:8080/v1" \
  --responses_api_api_key "" \
  --responses_api_stream \
  --enable_live_transcription
Once running, just speak into your microphone. The system will:
- Detect when you start speaking (VAD)
- Transcribe your speech (STT)
- Send it to the local LLM to generate a reply
- Synthesize the reply and play it through your speakers (TTS)
--enable_live_transcriptionwill also display the recognized text and generated text in real-time in the terminal.
This completes the full loop. You don't need to write any code, just chain CLI parameters.
3. One-Command Optimization for Mac
macOS users get an extra perk: the project provides a single optimal configuration flag:
bash
speech-to-speech --local_mac_optimal_settingsThis automatically configures MPS device, MLX backend, local mode, and all settings tailored for Apple Silicon. You can also specify a custom model on top of it:
bash
speech-to-speech --local_mac_optimal_settings --model_name mlx-community/Qwen3-4B-Instruct-2507-bf16Common Pitfalls & Troubleshooting
1. CUDA Version Mismatch
On Linux, the default qwentts-cpp-python dependency requires CUDA 12.8. If your system has CUDA 12.4 or 13.x, install the matching wheel first:
bash
## Example for CUDA 12.4:
pip install "qwentts-cpp-python==0.3.0+cu124" \
  -f https://huggingface.co/datasets/andito/qwentts-cpp-python-wheels/tree/main/whl/cu124
pip install speech-to-speech
2. NumPy Version Conflict
If you need DeepFilterNet for audio enhancement, note that it requires numpy<2, while Pocket TTS requires numpy>=2. They cannot be used together, so choose based on your primary needs.
3. Slow Initial Model Loading
The first startup will download several GBs of model weights. STT (Parakeet), TTS (Qwen3-TTS), and LLM (Gemma 4 ~2.7GB) are downloaded on demand. Subsequent launches will be much faster.
4. Chinese Language Support
The default Parakeet TDT supports 25 European languages and does not cover Chinese. If you need Chinese speech recognition, switch to the Whisper series:
bash
speech-to-speech \
  --stt whisper \
  --stt_model_name large-v3 \
  --language zh
Naturally, Whisper demands more compute and introduces higher latency—a trade-off to consider.
5. Python Version Too Low
The project strictly requires Python 3.10+. If your system defaults to 3.8 or 3.9, make sure to create a new environment using conda or pyenv.
Conclusion
Let's recap what we accomplished today:
- Installed the
speech-to-speechpackage. - Launched a local LLM service (via llama.cpp).
- Chained VAD → STT → LLM → TTS using
--mode local. - Spoke into the mic and received a voice response.
The core philosophy isn't about writing code, but understanding the responsibilities and boundaries of each component, then assembling them via CLI parameters. This is precisely the most practical approach for building voice Agents in enterprise settings—get it running first, then customize.
Next Steps
- Try
--mode realtimeto connect your own client or frontend app via WebSocket. - Experiment with different TTS backends (Kokoro, Pocket TTS, MMS) for voice quality.
- Study the OpenAI Realtime API protocol to build your own voice interaction client.
- Explore multi-language switching (
--language auto) for cross-lingual voice conversations.
The era of Voice AI is here. Don't just stay at the demo stage. Get your hands dirty, run it locally, and you'll realize you're only a few tweaks away from shipping a real product.
If you run into any issues, feel free to drop a comment below. I'll reply to each one.